Why can’t it be Round?

It has been a long time again since I’ve posted. Two reasons. One, through the generosity of a visitor, I’ve been digesting some much more detailed information about the original DIY version of the RSTL. When I get done with the translations and cleanup, I’ll post more about what I’ve learned here.

Today though I’ll tell you about a(nother) project that took WAY longer than it should have – creating the countersink template for the woofers. Oh why oh why can’t they be nice and round like most of the other drivers I’ve worked with over the years? Even the line array of ribbons I used in my last speaker were nothing compared to this guy.

I used “Easy Driver Flush-Mounting” in the June 2001 audioXpress as my guide. Suffice it to say Mr. Buike was facing far fewer issues with the Focal woofer in his example than I did with the Tang Band’s irregular shape. The basic idea is to use a flush-trimming bit with a bottom-mounted guide to create a template 1/2″ larger than the driver:

Image of Routing first template

Using router table, trim bit and driver to make 1/2 inch “oversize” template

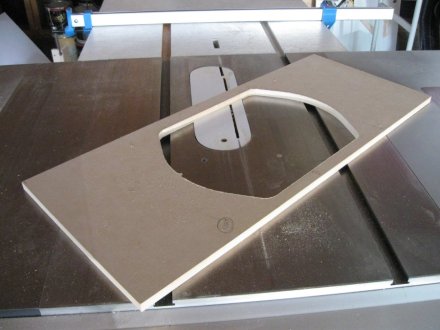
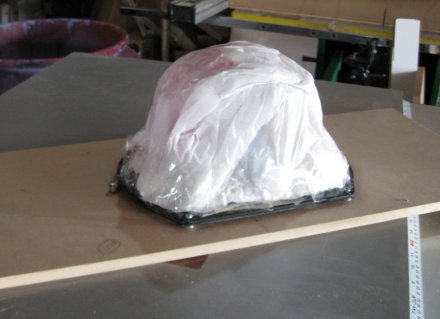
Note the taped-on plastic bag to keep dust out of the driver. Also note the trim bit protruding just to the left of the driver, so it can use the edge of the driver as a guide. I’m going to skip a WHOLE BUNCH of stuff that turned out to be hard here and jump to the next good part. When it is all done, you’re left with a template that is the right shape except it is 1/2″ bigger than the driver on all sides (the width of the trim bit):

Image of completed first template

Completed first “oversize” template

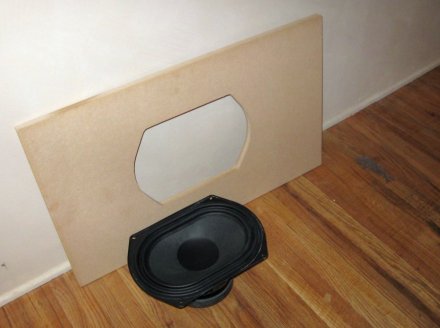
Finally, cut this template down by 3/8″ per side to leave a nice 1/8″ border around the driver:

Image of completed template

Completed template, with driver for comparison

Notice I left a large border all the way around the cutout, both to leave room to clamp the template and to support the router. A lesson learned (over and over) the hard way.

Crosscut sled project from Hell

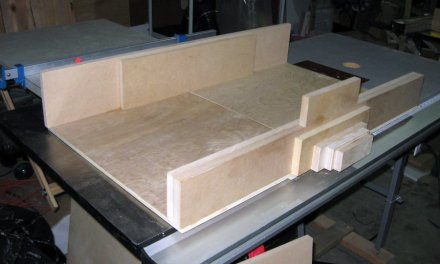
Every big project seems to have something that just doesn’t go well. At all. Well, at least one something. For me, it has been building a crosscut sled for the new table saw. It took me three tries and it still has a variety of problems. For now though, it will work and I can do most of the things I need to with it. It isn’t as pretty as the one on the cover of Fine Woodworking magazine:

Picture of crosscut sled

Crosscut sled sitting on table saw

However it (finally) works pretty well and is sturdier than my old one. The main problem now is that I need to make cross cuts 45″ long. While I can do this by supporting the piece to the right of the sled, currently there is no way to make repeatable cuts the way I can for short pieces by clamping a scrap against the back fence at the right distance. I’m considering now how to make some sort of extension to allow making these repeatable 45″ cuts, as there are many of them in a RSTL.

Getting a Woody!

Boy, it has been over a month since I’ve posted! Most of the past month focused on adding to my woodworking tools. I’ll go into more details in future posts, but here is a quick overview of all the great new (and used) equipment I’ve added:

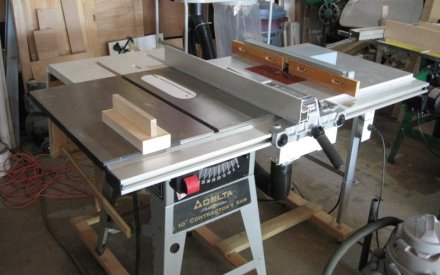
Used table saw with router table extension

Craigslist table saw with router table extension


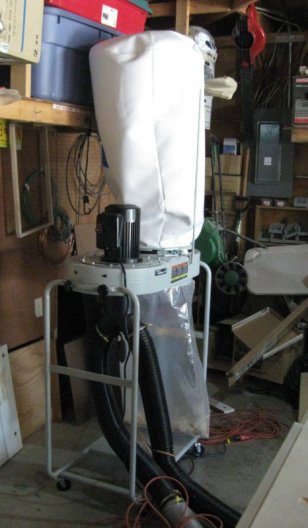
Delta dust collector

Delta dust collector for table saw and router table


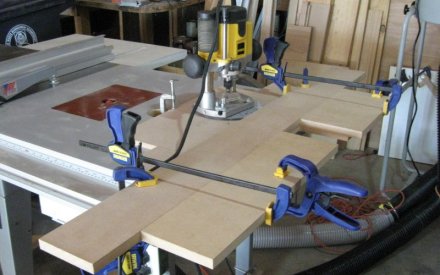
Router table and new clamps

With two routers, I can leave one in the router table while keeping my DeWalt plunge router for hand use. I picked up a bunch of new clamps too.

I’ve also had to spend time building a cross-cut sled, a push stick, a 135 degree angle jig… More about these in a future post.

The Holy Grail found?

Through DIY Audio member Duck-Twacy’s generosity and zelfbouwaudio.nl member Sark’s vision, I finally have a copy of the Klang+Ton article on the DIY version of the RSTL from the December 1987/January 1988 issue. That was the first thing I learned – this article was in a single issue. I’d just assumed Klang+Ton was a monthly and it was a two-part article. Way back in 2003 Duck-Twacy posted on the DIY Audio forum that he had the article and was willing to scan for interested parties. This sounded promising, but this post was over 9 years old. Would he still be reachable on DIY Audio? Would he still have this now 24+-year-old magazine?

The answer to the first question is yes, Duck-Twacy still is reachable via the DIY Audio site some 9 years later. Amazingly, he responded overnight to my request for the scan! Did he actually still have the magazine? It didn’t sound like it, but his colleague Sark on the zelfbouwaudio.nl forum had the foresight and vision to scan all of his Klang+Ton issues, presumably just for circumstances like this. They made the entire issue available to me.

Gentlemen, thank you both. I’ve been searching for this article for a long time, so I can’t tell you how much I appreciate you making it available to me!

Proof of concept crossover complete

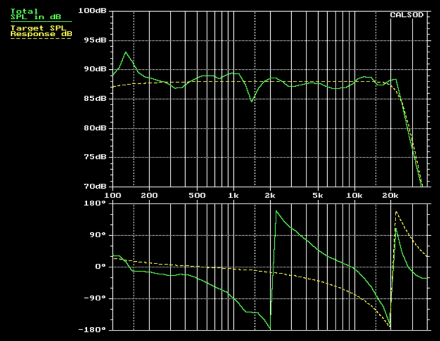
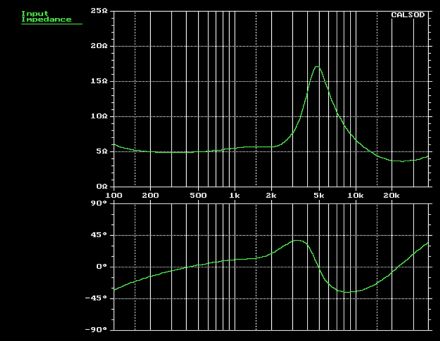
My goal was not to make a proper crossover, but rather to convince myself a crossover existed that would reasonably blend the upper three drivers (I’ve already decided it will be at least bi-amped) and have an acceptable impedance curve. I’ve been worried about the latter given that most drivers these days are 4 ohm and it is almost impossible to find any drivers over 8 ohms. Here is what I ended up with – a 4th order LR @ 2.2kHz and the super tweeter coming in at about 13kHz, 1st order.

Graph of frequency response

CALSOD model of frequency response for a proof of concept crossover


Graph of impedance

CALSOD model of impedance for a proof of concept crossover

The frequency response is quite acceptable, with the only major glitch being the notch at about 1.4kHz. That is in the woofer response and not a crossover anomaly. I’d have to look at a lower crossover point and/or a gentler slope to allow the tweeters to help fill that in. We’ll see. The impedance stays above 5 ohms until about 13kHz, so it shouldn’t be a difficult a load.

So I’d say mission accomplished.

The prototype drivers are here!

Since my second article back in February, I’ve done some re-thinking on drivers. I got a sample of the Vifa, but it my mind it was just too small. And too expensive for what it was. After finding and pouring over plans, I concluded that I could move to a 5″ class driver. After hours studying the Zaph Audio 5.5″ Driver Comparison page along with countless other resources, I decided try the SB Acoustics SB15NRXC30-8-UC for my prototype. For about $55, the distortion measurements are very close to the $200-$300 drivers he surveyed. On paper, it looks like the best 5″ value around. We’ll see how it sounds.

Center panel using Seas 27TBCD/GB-DXT

Option 1: center panel layout using a single Seas 27TBCD/GB-DXT

For the tweeter, I’ve had two ideas. One is to abandon the Tweeter-Super Tweeter-Tweeter arrangement completely and use a single tweeter with exceptional off-axis response instead. That is the reason Wright really went to the T-ST-T arrangement from what I can tell, to get good off-axis (the way the speaker was intended to be used) high frequency extension, not to extend on-axis response to 35K. The tweeter capable of crossing over at around 2K and yet having flat response at 20K @ 30 degrees off axis? Why the Seas SEAS 27TBCD/GB-DXT of course. The published data sheet shows the response 30 degrees off axis is only 1-2 dB down from the on-axis response. Wow!

This would be a major break with tradition though, which is disturbing to me. The center column then becomes a “regular” M-T-M. I wonder if Wright were alive today though if he would not do the same thing.

Driver layout using the SB Acoustics SB29RDCN-C000-4 and Vifa NE19VTC-04

To take a more traditional approach, I’ve decided to change from the Scanspeak D2608/9130 that I had originally had my eye on to the SB Acoustics SB29RDCN-C000-4. This will allow me to keep the original driver spacing. I’d originally shied away from it due to the 4 ohm impedance, but with 94 dB sensitivity, I’ll have all sorts of room to manipulate the impedance in the treble. The M-T-ST-T-M configuration (I’m still using the NE19VTC-04 for the supertweeter) will look something like the picture to the left.

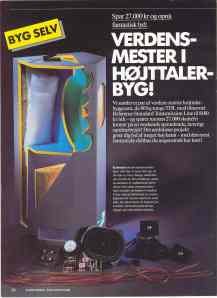
Norwegian article about DIY kit

In this 19 page thread on the Norwegian site HIFISENTRALEN:

http://www.hifisentralen.no/forum/index.php/topic,17539.0.html

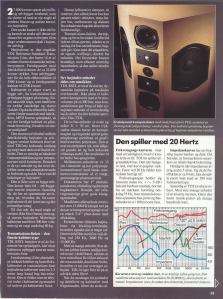
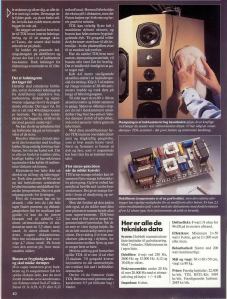
I found an article about the kit version of the original RSTL. The good news is that it is easily readable. The bad news is it clearly isn’t as detailed as the Klang+Ton article. Still, I’m really looking forward to translating it. The pictures are way cool too! I’ve attached the scans without permission below.

Cutaway shot of speaker

Page 1 (click for full size)

.

Frequency response, picture, text

Page 2 (click for full size)

.

Page 3 (click for full size)

.

Klang + Ton RSTL DIY Project

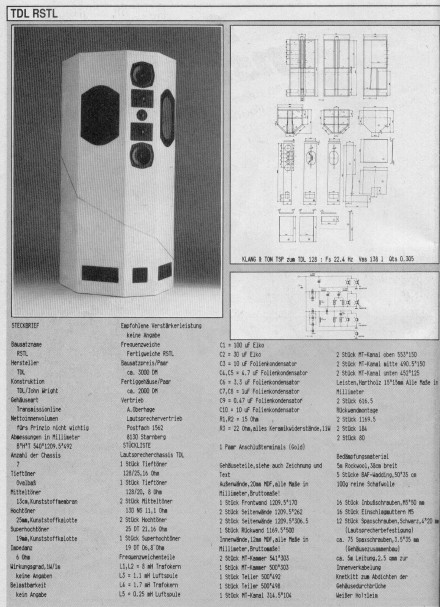
The original RSTL design was published as a kit in the December 1987 and January 1988 issues of the German DIY audio magazine Klang + Ton. I’ve searched all over for the entire article, but so far I’ve only found a link to a photo of one page from this topic on a forum for classic KEF speakers:

http://www.hifiloudspeakers.info/speakertalk/viewtopic.php?p=6854

I’ve copied the picture below to make sure this priceless heirloom isn’t lost. I’ll remove it at the request of the original owner. As you can see though it really isn’t clear enough to make out much of the required information, though after pouring over it for some time, I have gleaned a great deal of information from it:

Fact sheet from RSTL plans in Klang + Ton

The "Fact Sheet" from the Klang + Ton plans for the RSTL

My German is not what it used to be – actually I don’t know German at all – so I sat down with Google Translate and came up with this translation of the text:

Fact Sheet

Kit Name

RSTL

Manufacturer

TDL

Construction

TDL/John Wright

Enclosure Type

Transmission Line

Net Internal Volume

Not important for TL

Dimensions in mm

WxHxD 540x1209x492

Number of Drivers

7

Woofer

Ovalbaß (oval)

Midrange

13cm, plastic cone

Tweeter

25 mm, Plastic dome

Super tweeter

19 mm, Plastic dome

Impedance

6 Ω

Efficiency, 1W/1m

Not available

(Power) Rating

Not specified

Recommended amplifier power

Not specified

Crossover

Finished crossover RSTL

Kit price/pair

About 3000 DM

Sales

A. Oberage
Lautsprechervertrieb
Postfach 1562
8130 Starnberg

Bill of Materials

Loudspeaker Drivers TDL
  • 1 woofer 128/25, 16 Ohm
  • 1 woofer 128/20, 8 Ohm
  • 2 mids 130 NS, 11.1 Ohm
  • 2 tweeters 25 DT, 16 Ohm
  • 1 super tweeter 19 DT 06, 8 Ohm
Crossover
  • L1, L2 = 8 mH Iron core
  • L3 = 1.1 mH Air core
  • L4 = 1.7 mH Iron core
  • L5 = 0.25 mH Iron core
  • C1 = 100 μF Electrolytic
  • C2 = 30 μF Electrolytic
  • C3 = 10 μF Film
  • C4, C5 = 4.7 μF Film
  • C6 = 3.3 μF Film
  • C7, C8 = 1 μF Film
  • C9 = 0.47 μF Film
  • C10 = 10 μF Film
  • R1, R2 = 15 Ω
  • R3 = 22 Ω, ceramic, 11W

Cabinet Parts
refer to drawing and text

Exterior walls, 20mm MDF, all dimensions in mm, gross
  • 1 front wall 1209.5×170
  • 2 side walls 1209.5×262
  • 2 side walls 1209.5×306.5
  • 1 back wall 1169.5×500
Interior walls, 12mm MDF, all dimensions in mm, gross
  • 2 MT-Chamber 541×303
  • 1 MT-Chamber 500×303
  • 1 Divider 500×492
  • 1 Divider 500×498
  • 1 MT-Channel 314.5×10⁴
  • 2 MT-Channel above 553×150
  • 2 MT-Channel center 490.5×150
  • 2 MT-Channel below 452×125
Use hardwood 15x15mm, all dimensions in mm
  • 2 616.5
Back wall assembly
  • 2 1169.5
  • 2 184
  • 2 80
Damping Material
  • 5m Rockwool 38cm wide
  • 5 BAF-Wadding, 50×35 cm
  • 100g pure lamb’s wool
Other
  • 16 Allen screws, M5x50mm
  • 16 T-nuts, M5
  • 12 Screws, black, 4x20mm
  • 75 Screws, 3.5x35mm
  • 5m wire, 2.5mm², for wiring
  • Putty to seal the enclosure openings
  • 1 pr gold binding posts

The wood is here!

I’ve decided. The speakers will be Cherry. I’ve taken delivery of 3 sheets of 3/4″ pre-veneered Cherry MDF, 2 sheets of plain 3/4″ MDF, 2 sheets of 1/2″ plain MDF and a sheet of 18 mm Baltic Birch. In each case it is one sheet more than I need for a pair, if I make no mistakes. In the case of the pre-veneered Cherry, there are only millimeters to spare. I’m sure in the TDL cabinet shop this was no problem; my chance of success is zero. So at a cost of over $500.00, I have what I hope will be all the wood I need. They will be considerably better looking than the originals. This picture doesn’t do the Cherry justice – I took the picture right at sunset, so the grain isn’t captured very well.

Photo of Cherry veneer

Sample of pre-veneered MDF to be used in construction